Computer Room Facelift
2024-04-15
In-between dorking around with 10Gbit home networking, I did a real home project.
Michele’s business has grown enough that we can justify her moving out of the house and into her own place of business. This takes a chunk of income away, but, the idea is that we don’t have to have people come into our home to work. Also, if we have to leave, her business can continue to operate.
Anyway none of that is about me so who cares, back to this benefiting me personally.
This used to be our setup:
This was the before times
But it quickly became clear that our fun space didn’t pay bills, so Little Blue Olive took over
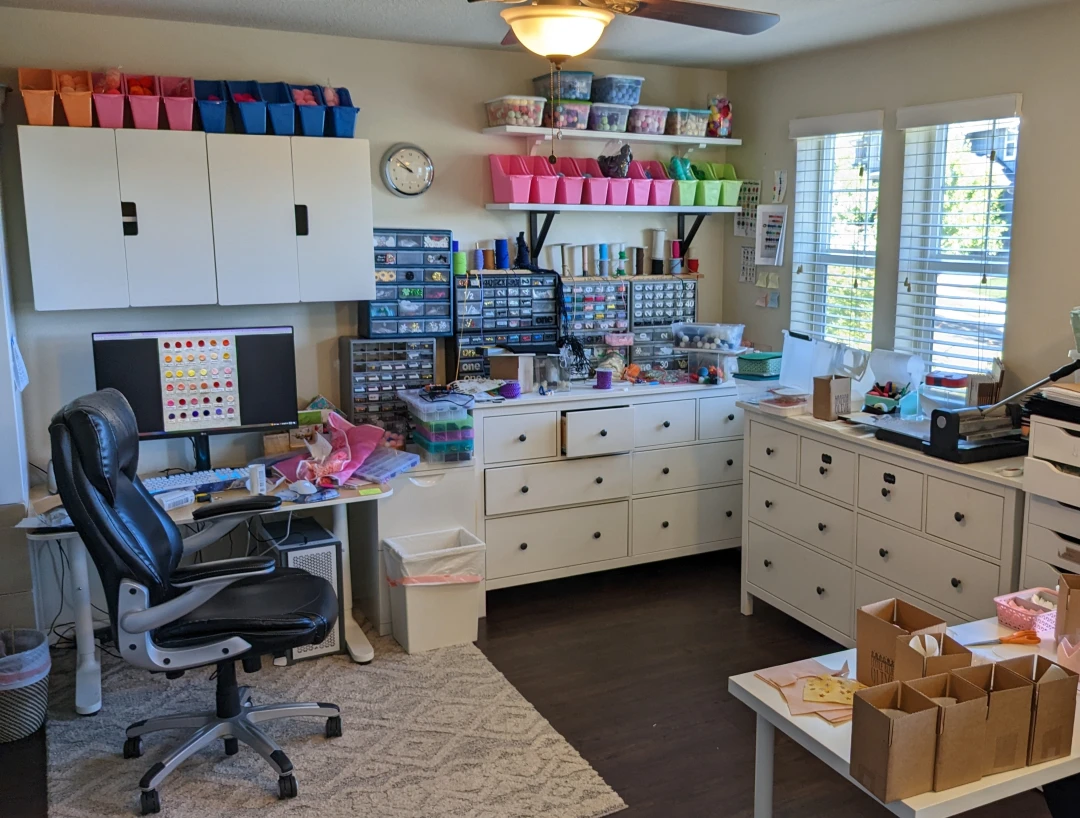
The real work happens here now
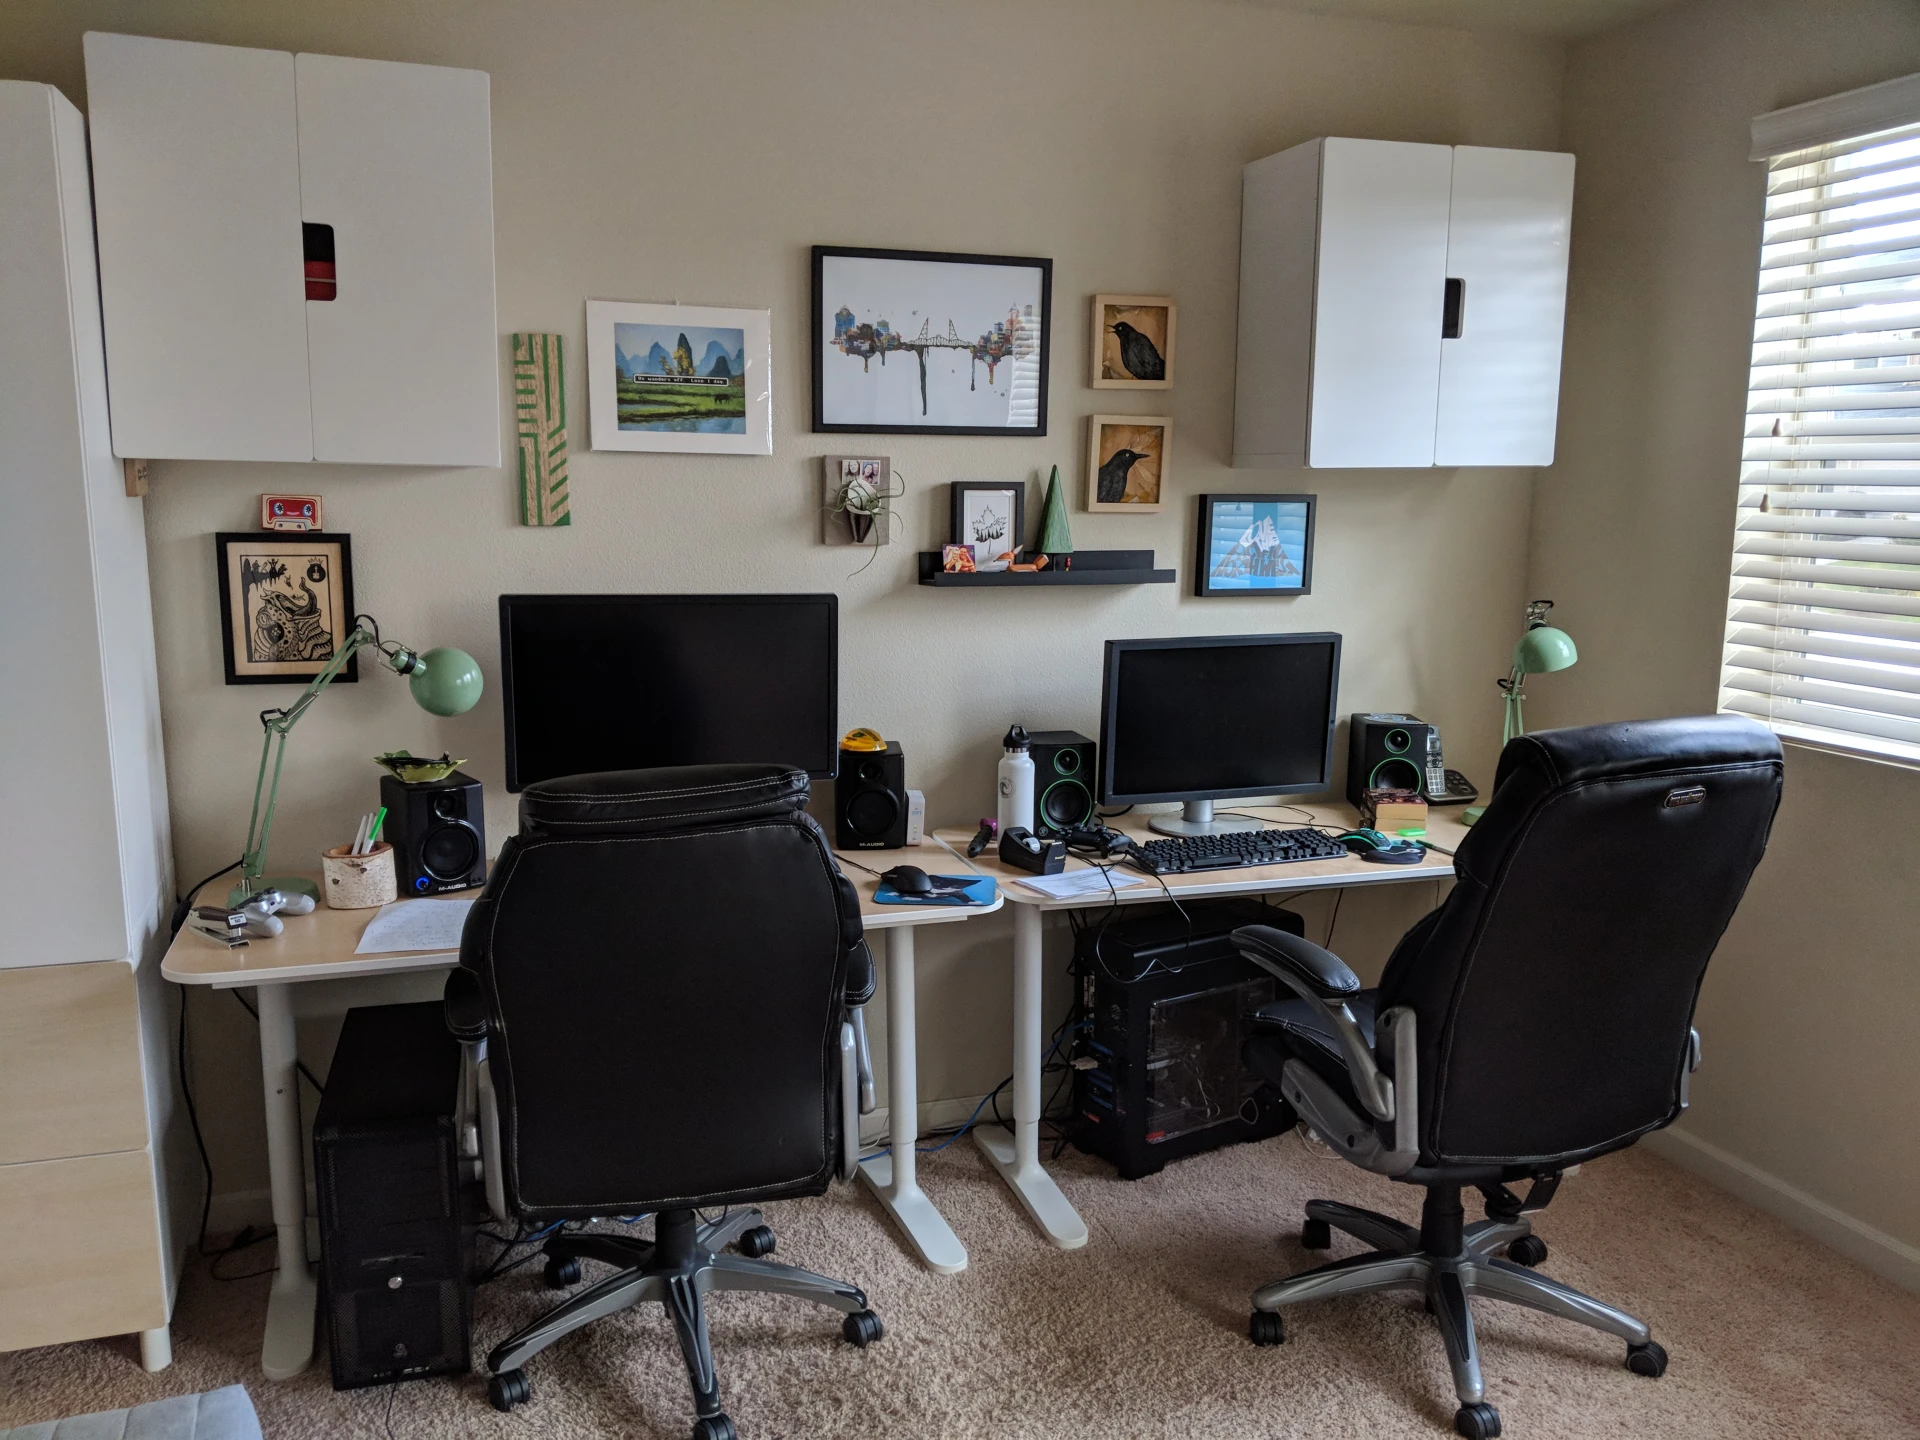
I didn’t love the arrangement, Mostly, because the room was to small for Owen to safely play VR without the risk of punching my monitor.
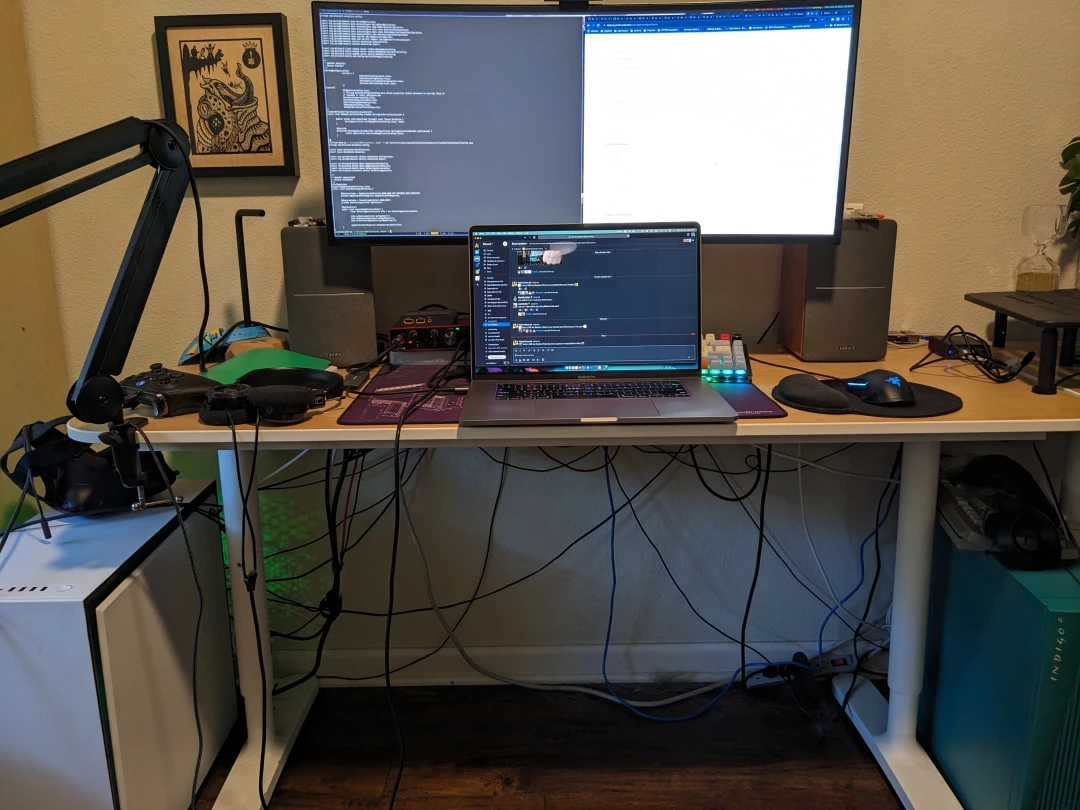
I have been exiled to a small corner office
After a lot of sketching, visiting Home Depot and Ikea, and weighing some options we decided to try building our own computer desks from kitchen cabinets.
Hear me out… Home Depot has these Hampton Bay kitchen sets. They look nice, and you can mix and match different options like three drawers or two selves. They sit too tall for a desk (I mean, unless you use a bar-stool or something but that’s dumb), but we thought “What if we cut them down?”
Insane, obviously.
BUUUT everything else we looked at didn’t give is what we wanted. So, we decided to buy the smallest one we would want in our configuration and use as a sacrifice.
Also, I was getting impatient.
We assumed the easiest thing was to cut it down by four inches, which is the “toe-kick” area of a kitchen cabinet. I pulled out the table-saw and went to work
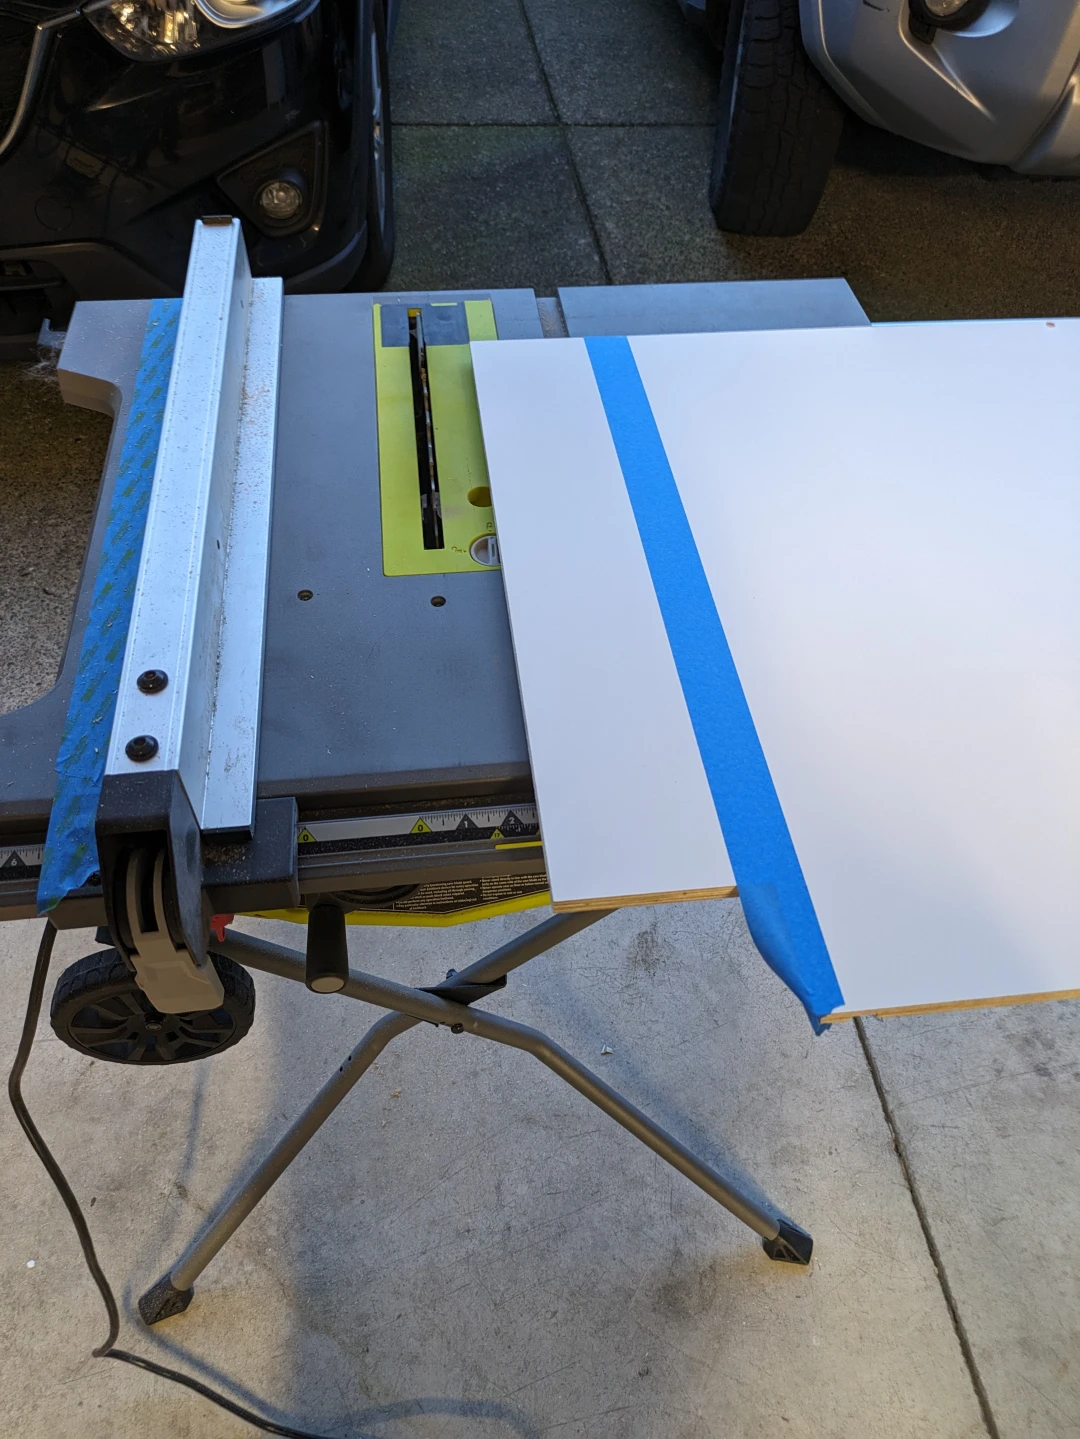
Using masking tape to reduce chip out. You can also minimize it by using a blade with more teeth. I didn't buy a new blade so I just made sure I taped well and also was mindful which direction the teeth were going.
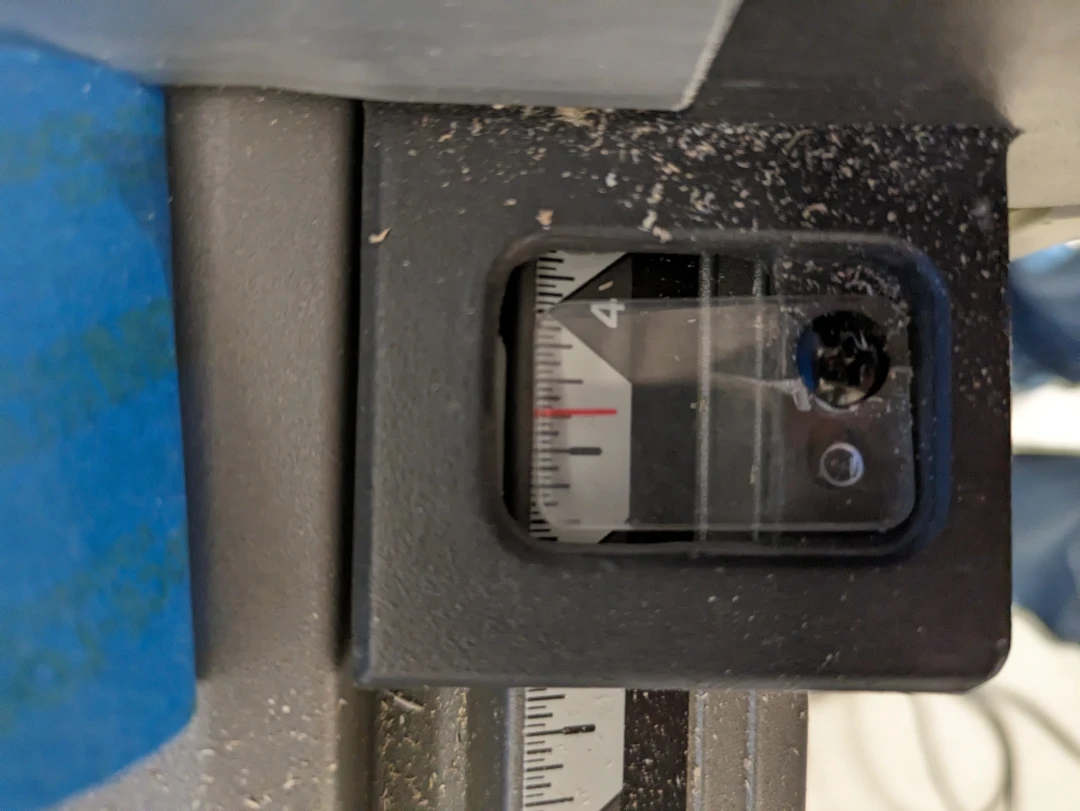
Almost 4 and 3/8ths
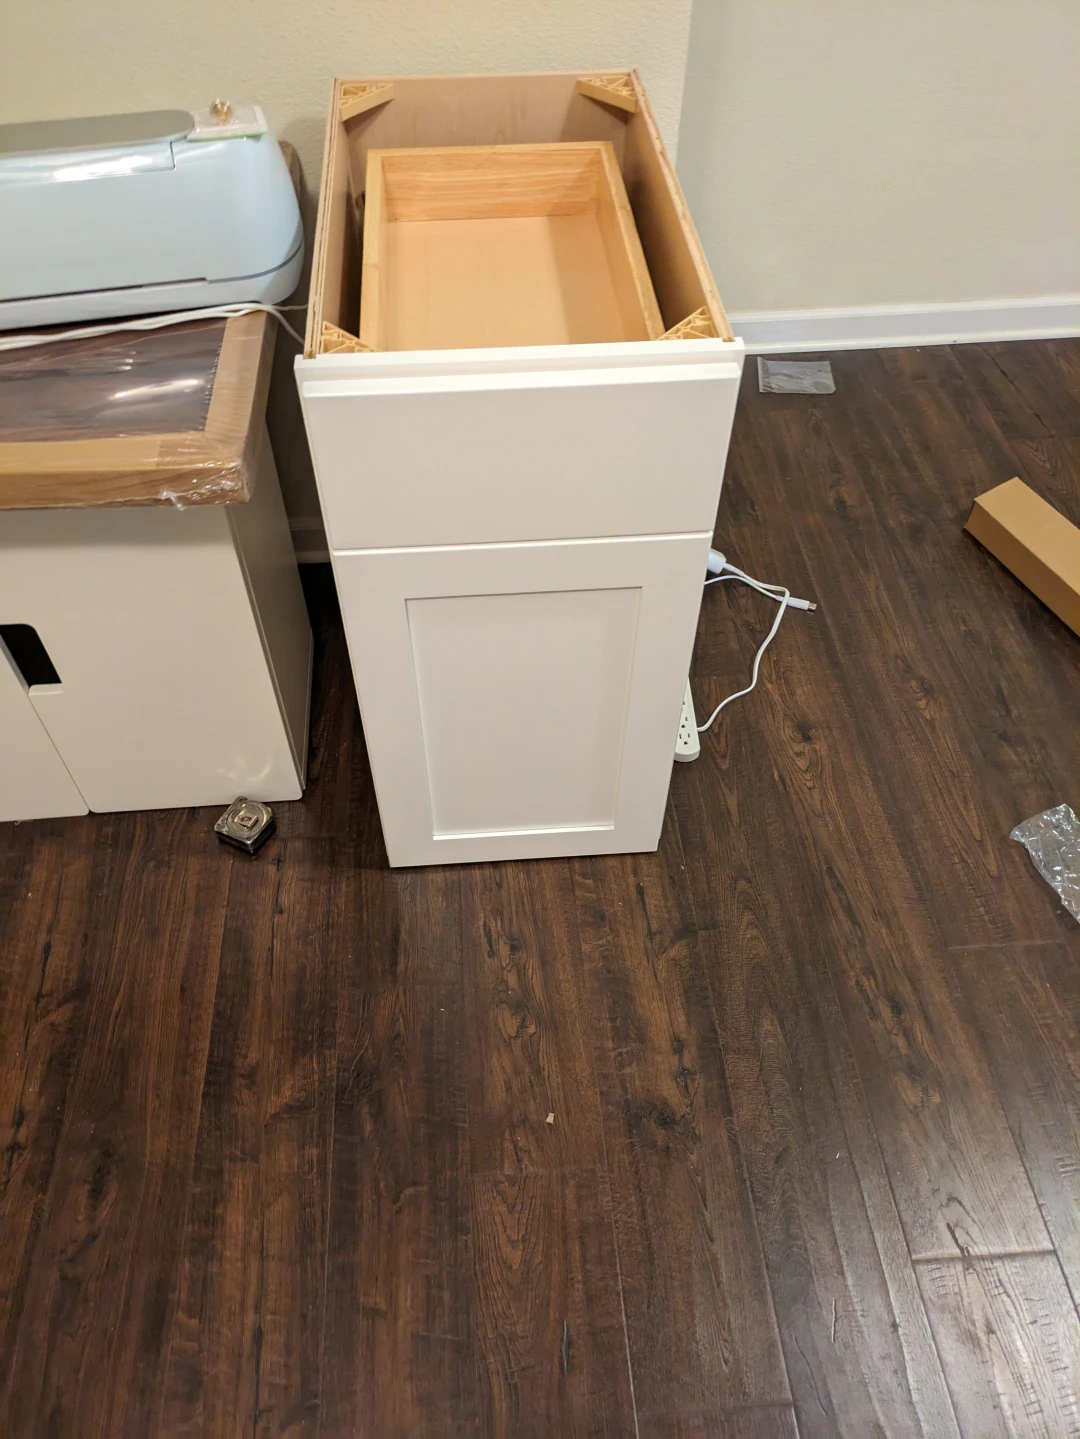
Here is a 15 inch for example all assembled

My collection of furniture you assemble yourself is growing
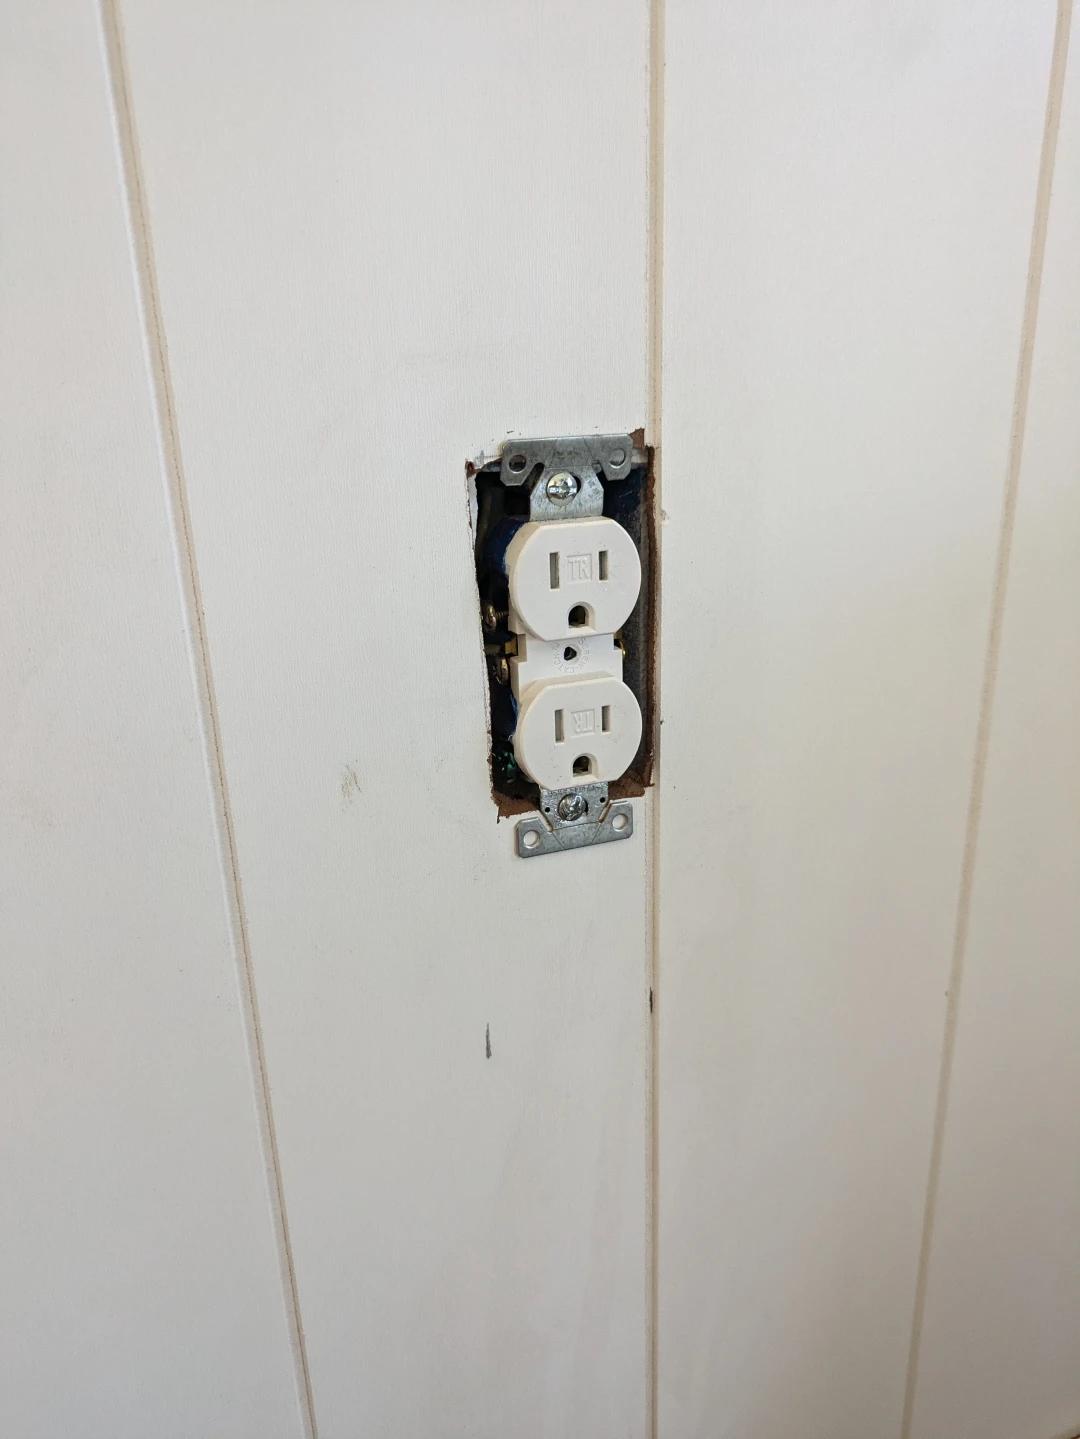
Ol Sparky!
Funny though, as I was wrestling the outlet through the new hole I accidentally grabbed the side terminals and got a surprising shock. I was really hoping for full cardiac arrest so my kids could get a huge life insurance pay out but no luck. I’ll have to continue my dangerous work from home and walking lifestyle…
Anyway, after ol sparky and I said hello again, I buttoned it up and never ever considered turning off the breaker. Look, 110V isn’t going to kill you. Big baby.
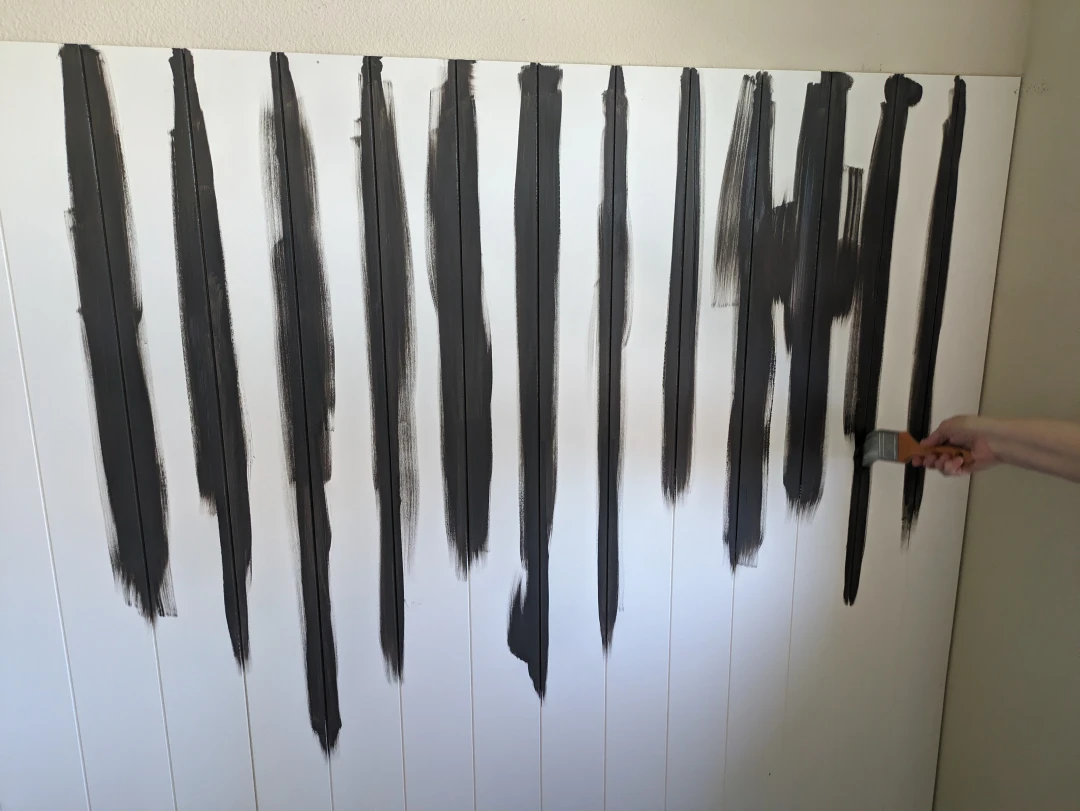
Painting begins
After many hours of staring at various shades of the same color, we settled on something like “Poppy seed”. We wanted a color that would help hide and blend in the monitors and their cables. It was also in honor of our little hedgehog, Poppy, that just past away the previous week

RIP Poppy 2017-2024. The only one in the house with a smoother brain than me
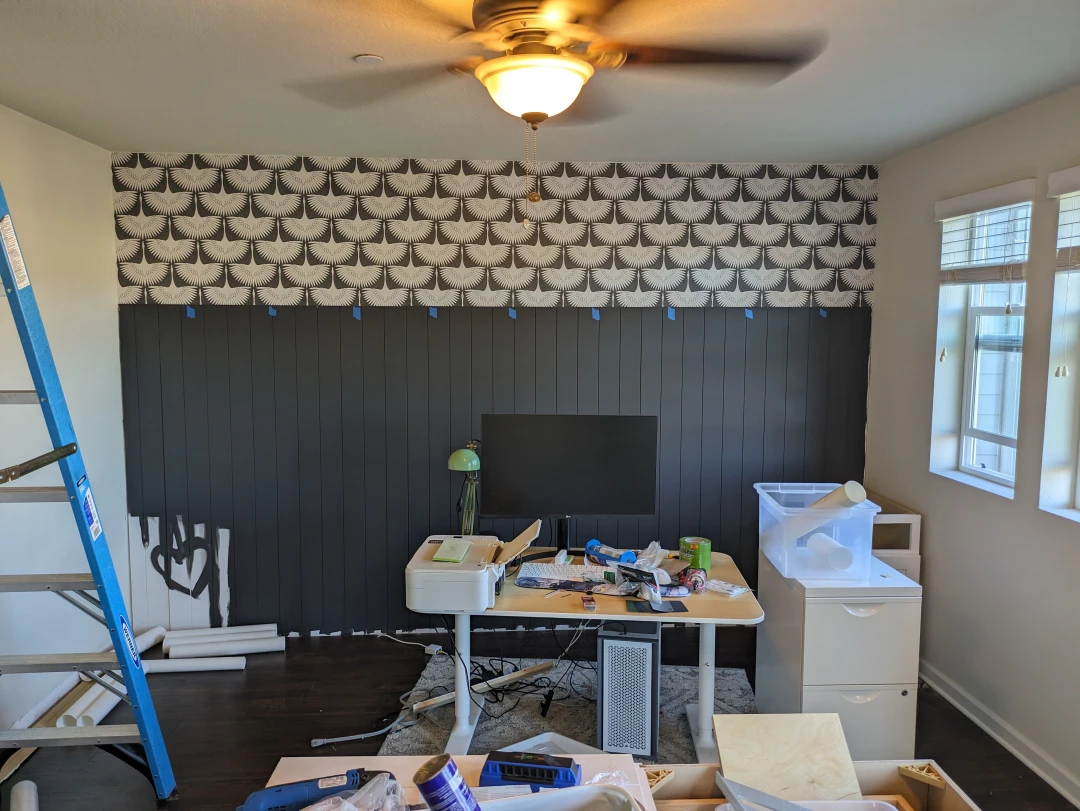
We also got some wallpaper
Now the room is shaping up. We just have to:
- Finish the cabinets
- Buy the counter tops
- remove the baseboards
- Get it all perfectly level
- Join the live edge butcher block counter-tops
- fill all of the old holes
- paint and touch up
- Move all of the computers back up
- redo networking
Fuck! That’s a lot more work than I was expecting.
But lets get to the part I was really dreading
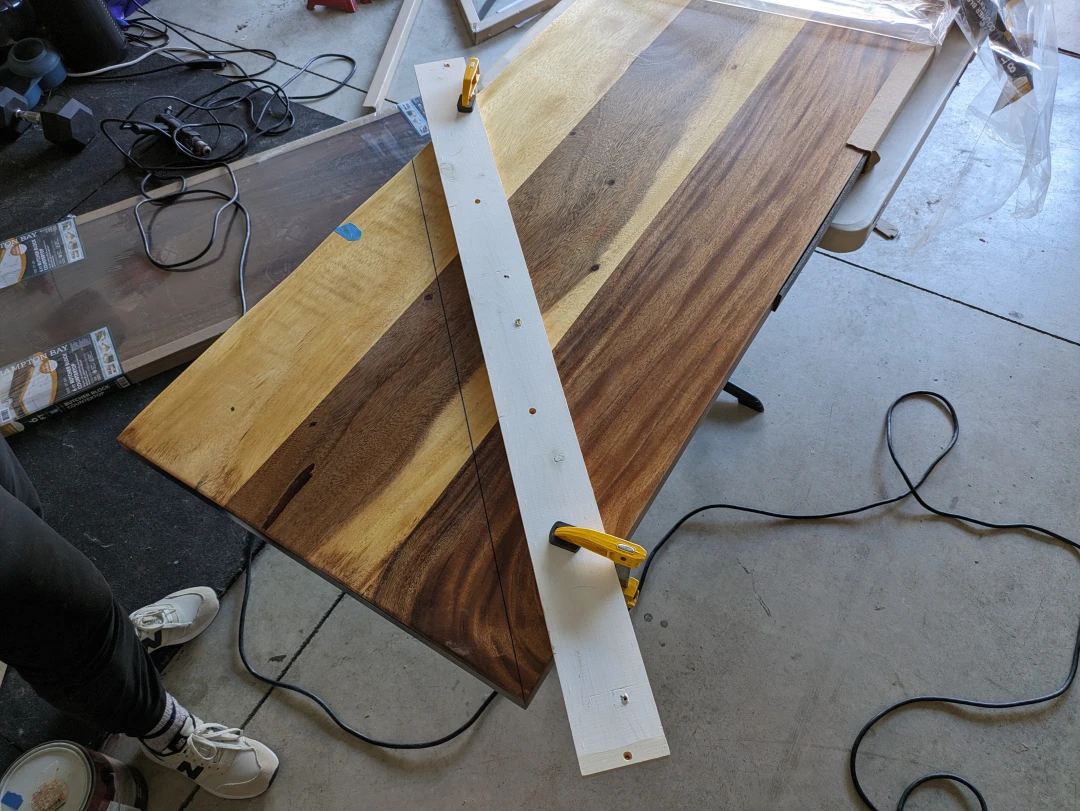
This cut right here
The only way to get two of these butcher block tops to line up, is to do two 45 degree cuts and join them together. If we had used the non-live edge tops we could have cheated and just butted them up together. That was not an option.
I don’t have a lot of tools for this level of carpentry. I’m also not skilled. Oh, my stepdad could have done it freehand with his skillsaw. Just resting part of it on his knee, and then holding the other part up with his hand.
Like a MAN
I’m a delicate SRE, and I really hate the skillsaw.
So, I bought the largest speed square I could get, marked the wood, and made a fence. I measured the “shoe” of the skillsaw to perfectly offset the fence.
Michele and I joked that out of this whole project, this was potentially a waste of $400
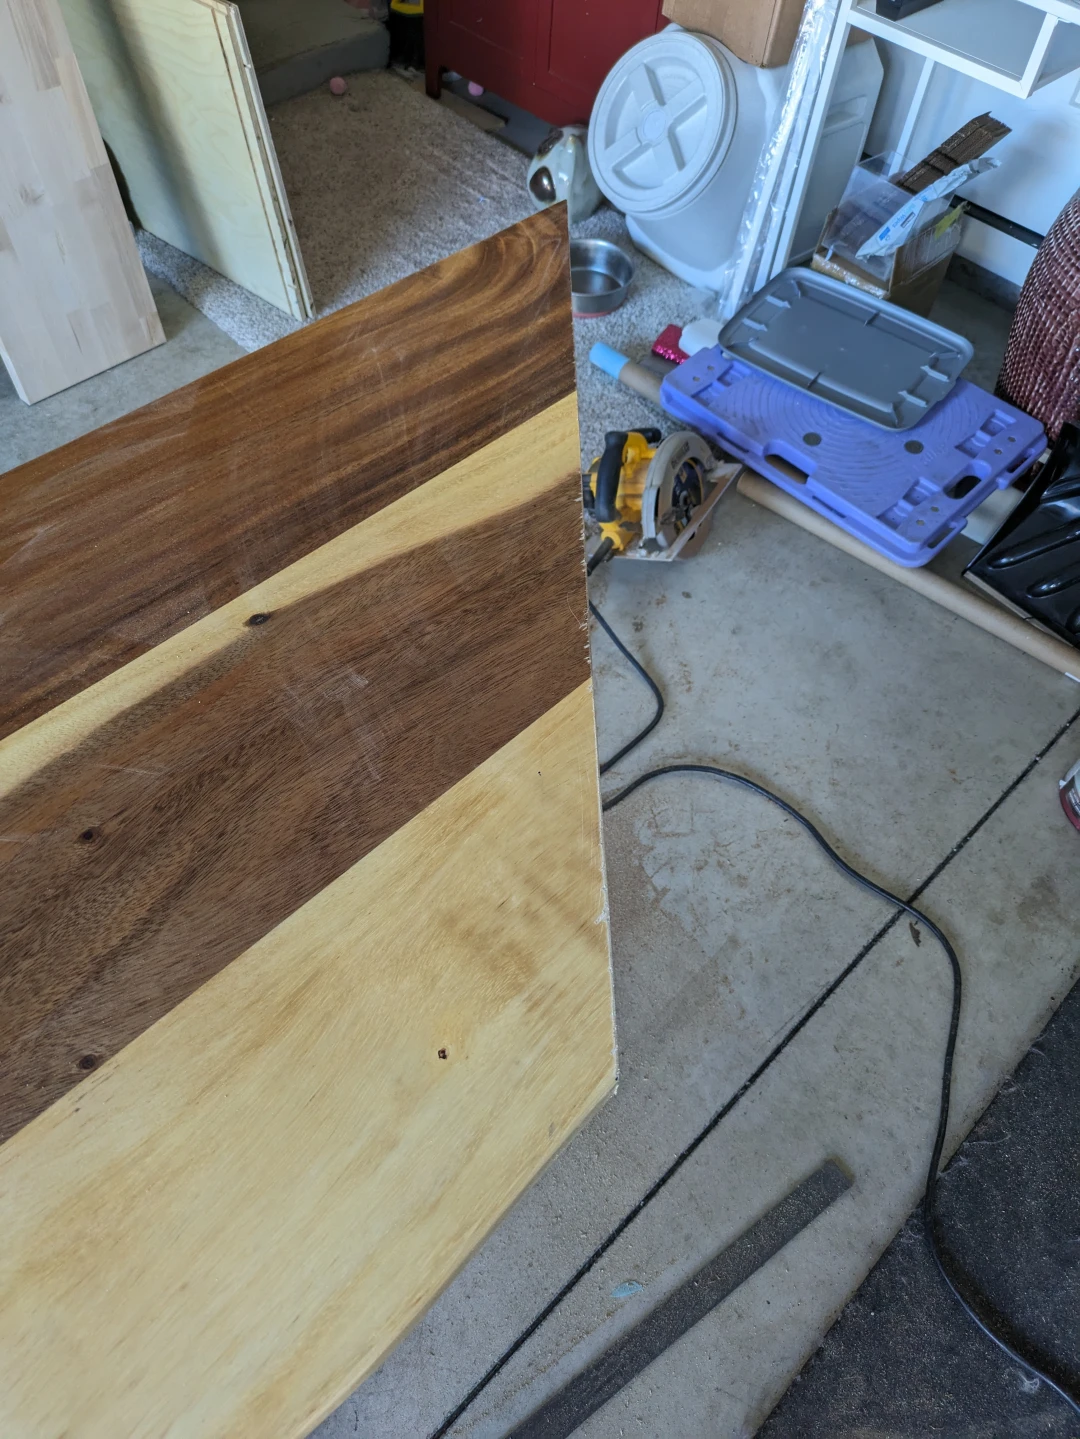
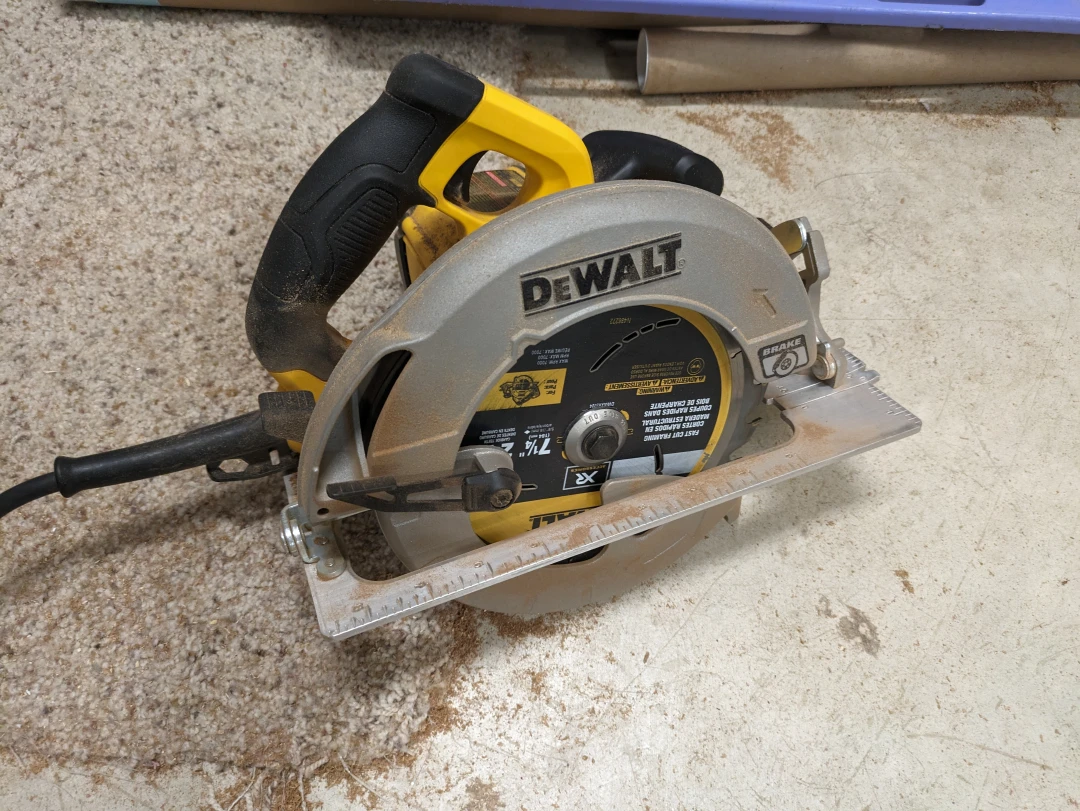
BAM! That skillsaw cut it like it was butter!
It was pretty damn perfect for a Carlson job. Our Dewalt skillsaw did a great job. The slight chip-out is only on the underside. Since a skillsaw’s blade goes in the “reverse” direction, you want to cut your piece with the bottom side facing up. That was at least one thing I recalled my Stepdad telling me.
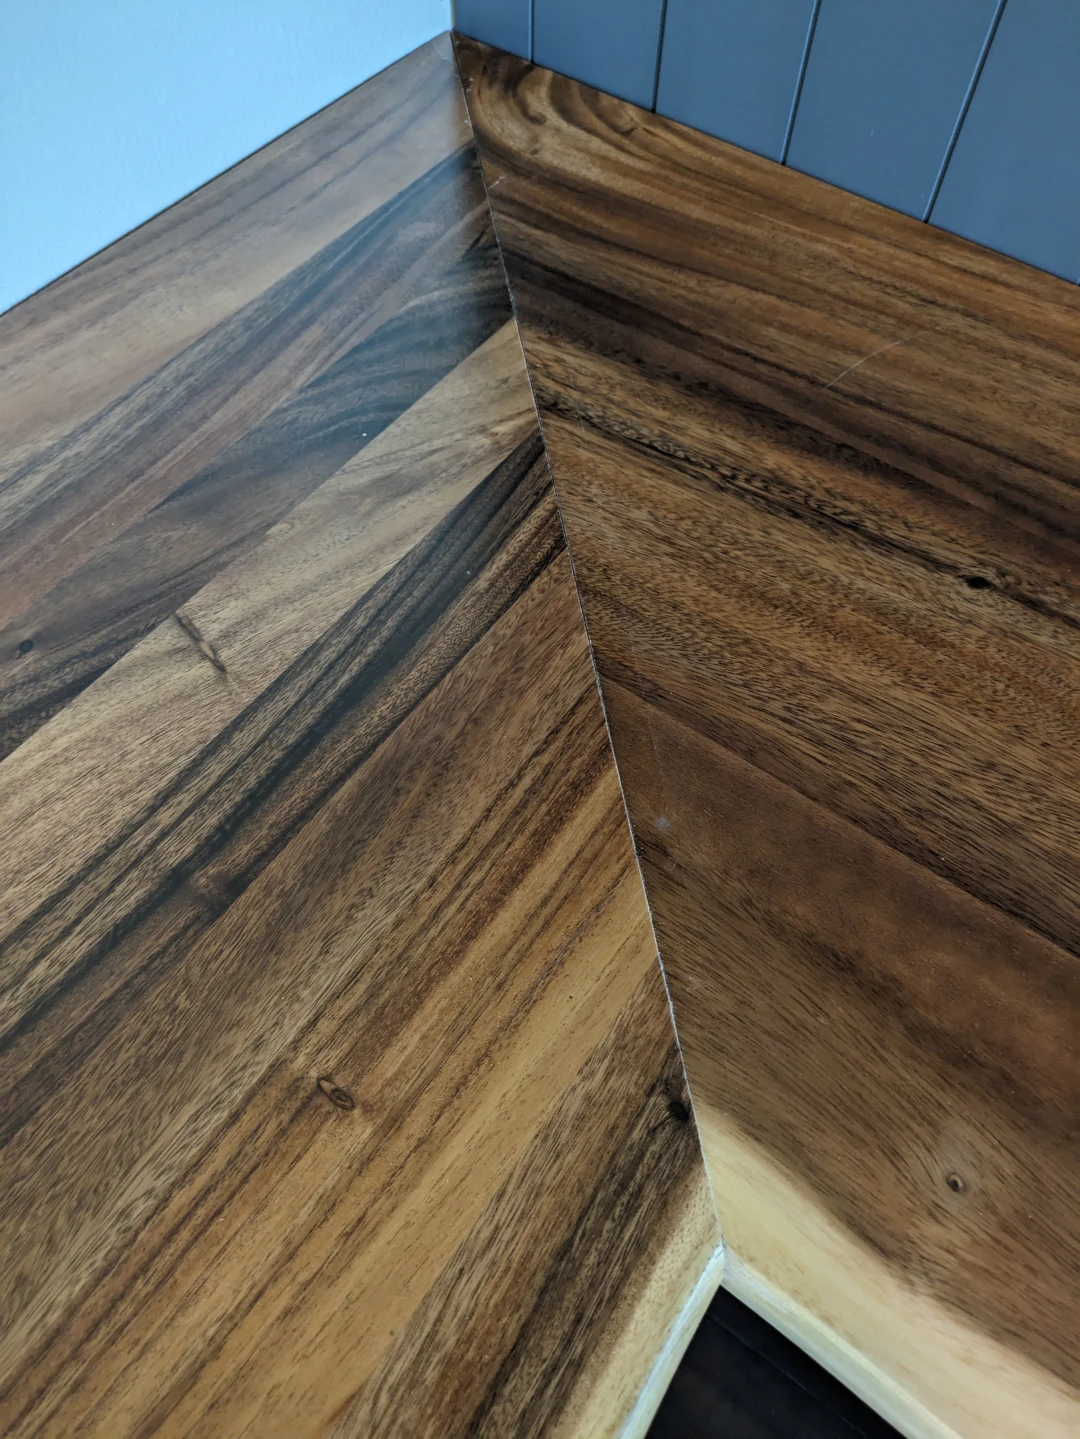
Here they are, joined perfectly.
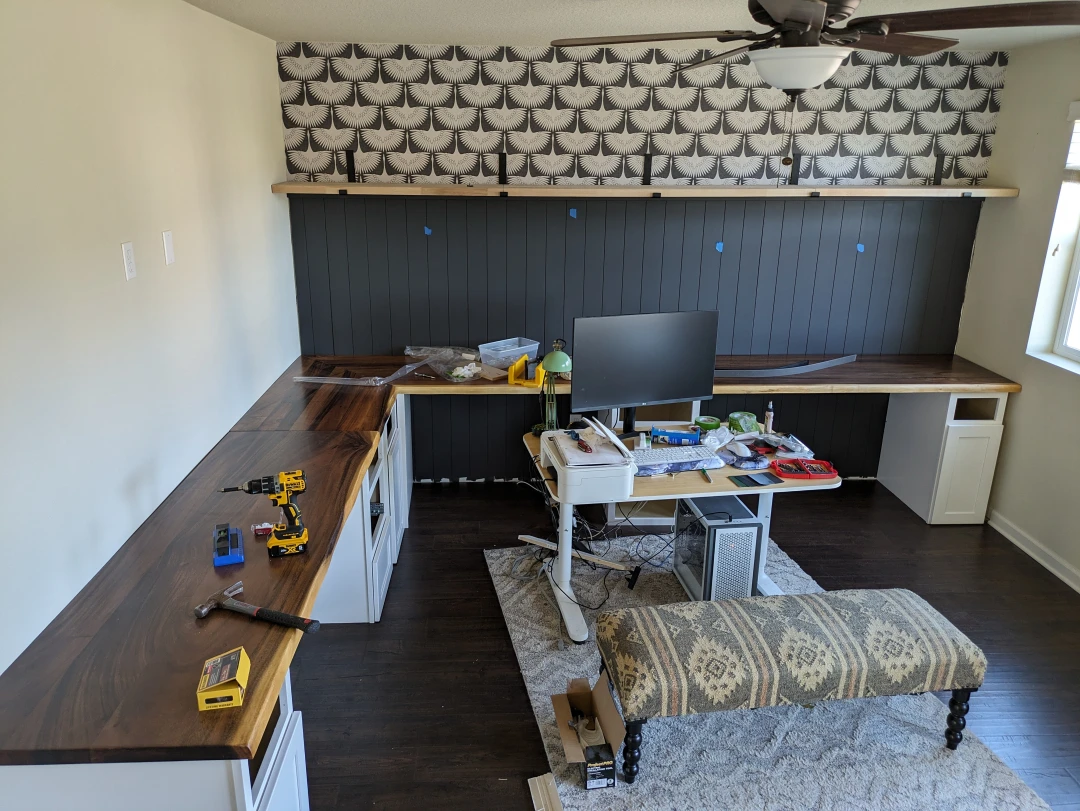
The room is shaping up! The blue masking tape is where the studs are in the wall, so I could secure the cabinets into them
Who's a good Dewalt! You are! Yes you are!
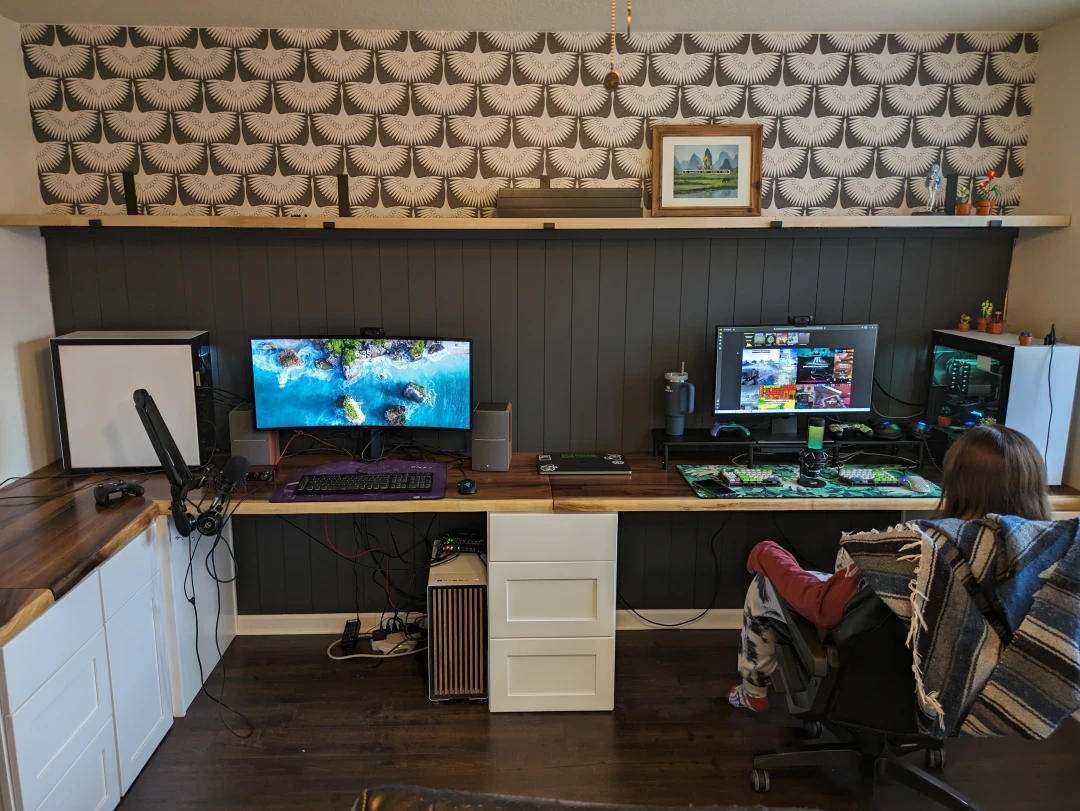
Moved in
Caralyne wasted no time. She has a huge chunk of desk space. More than me really, and I was the one that wanted more room for soldiering and repair projects.
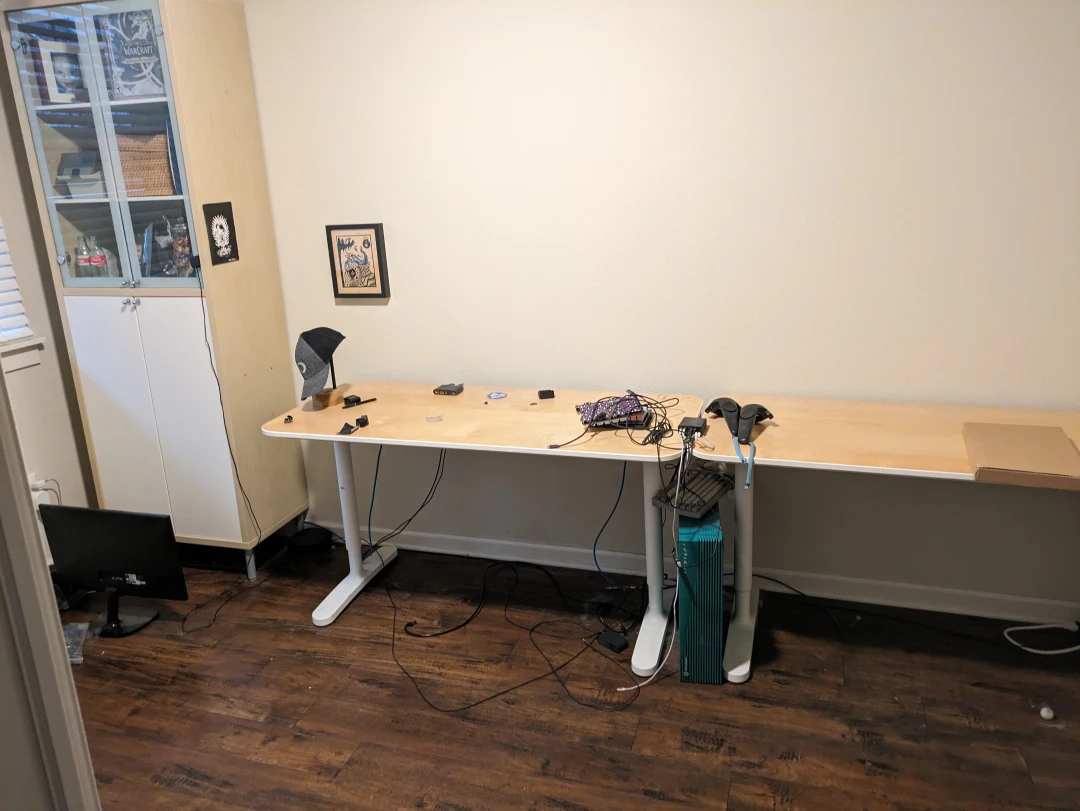
Oh, Look. the old room that I no longer care about
I may have made a joke that now that I was up in the perfect new room I didn’t have the desire, nor the care, to clean up my legacy.
Of course I cleaned it up! There are plans for that room now as well and none of them involve old SGI systems.
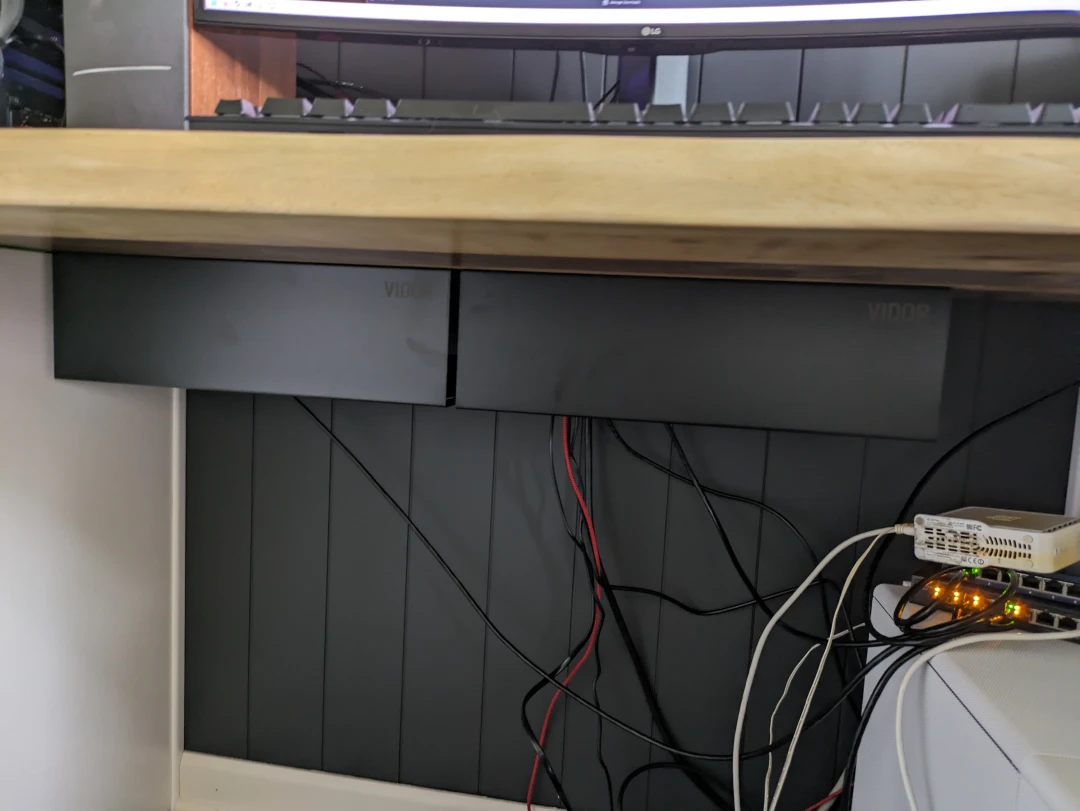
Cable organizer
Not shown in the other picture, but I got these hefty cable organizers for under my space and Owens. They screw into the counter-tops and feel nice and secure. Hides some of my mess.
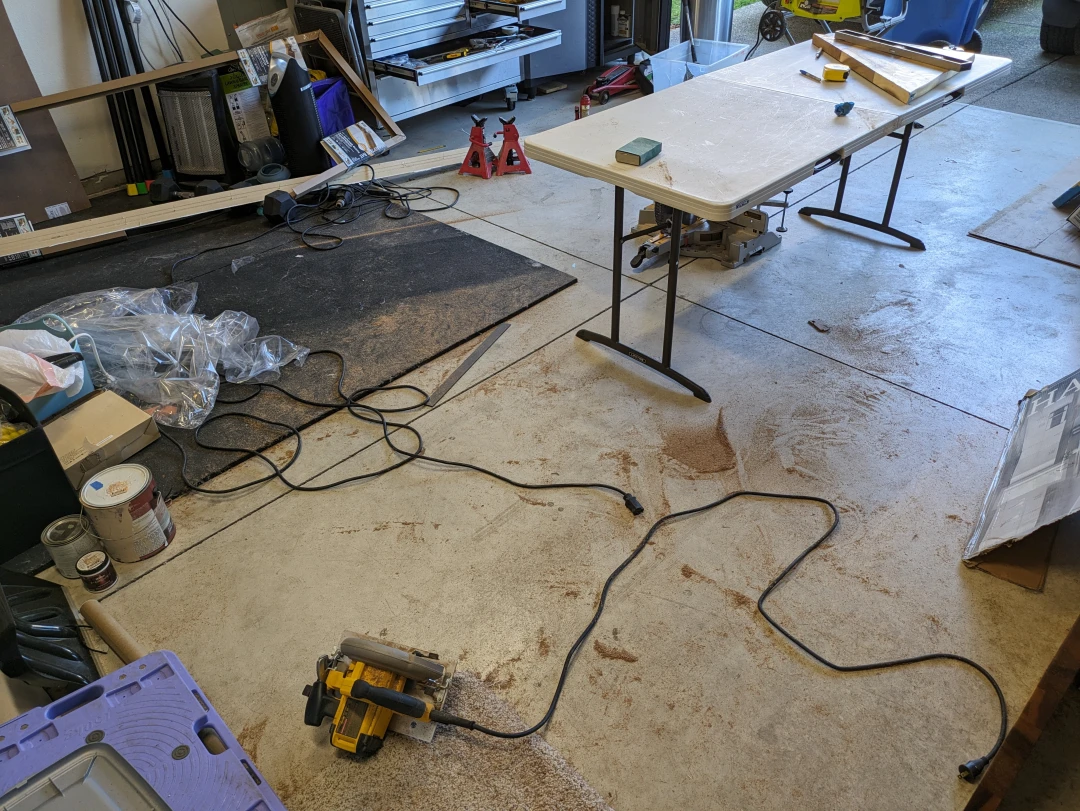
Whats left of the garage
Now we have a month long garage cleanup project… Probably more than a month.
I was able to get rid of the garbage and clean it out. Now we just need to decide how to organize and hopefully make it a lot more efficient for our tools and space.
This was a great project. The only part I absolutely hated was re-nailing in the baseboard. We didn’t have a pneumatic trim nailgun. We previously borrowed Michele’s Dads, but he wanted to make sure we brought it back. After I made my morbid jokes, I tried to convince Michele to let me buy a cheap one.
Hammering in long thin finish nails is NOT EASY. I’ve been down this road before. They bend so easily, and it took 6 nails to finally get one in properly.
I HATE TRIM BOARD AND THOSE NAILS.